
Variable tags are a special Qualified syntax that allow you to use data stored in a visitor field within a chatbot or experience on your website and populate visitor fields with data arriving inbound from other systems.
In this article, we’ll go over how to use variable tags specifically within your messenger and experiences to pull in dynamic data about your visitors and personalize their experience with you.
Getting Started
To get started, you’ll want to cruise over to your experience builder to get an idea of where you’d like to add dynamic content or personalization. You’ll want to make a return visitor experience since you’ll personalize the experience based off information you’ve previously collected about your visitor.
One use case we like to show off on Qualified is the ability to call out return users by their name. If a user has already given you their information previously, or if you’re using Clearbit Enrichment, you should have the name of the person already available to you.
We’ll use first name as an example here to show you one use case of variable tags to add personalization within your experience.
Edit the Experience
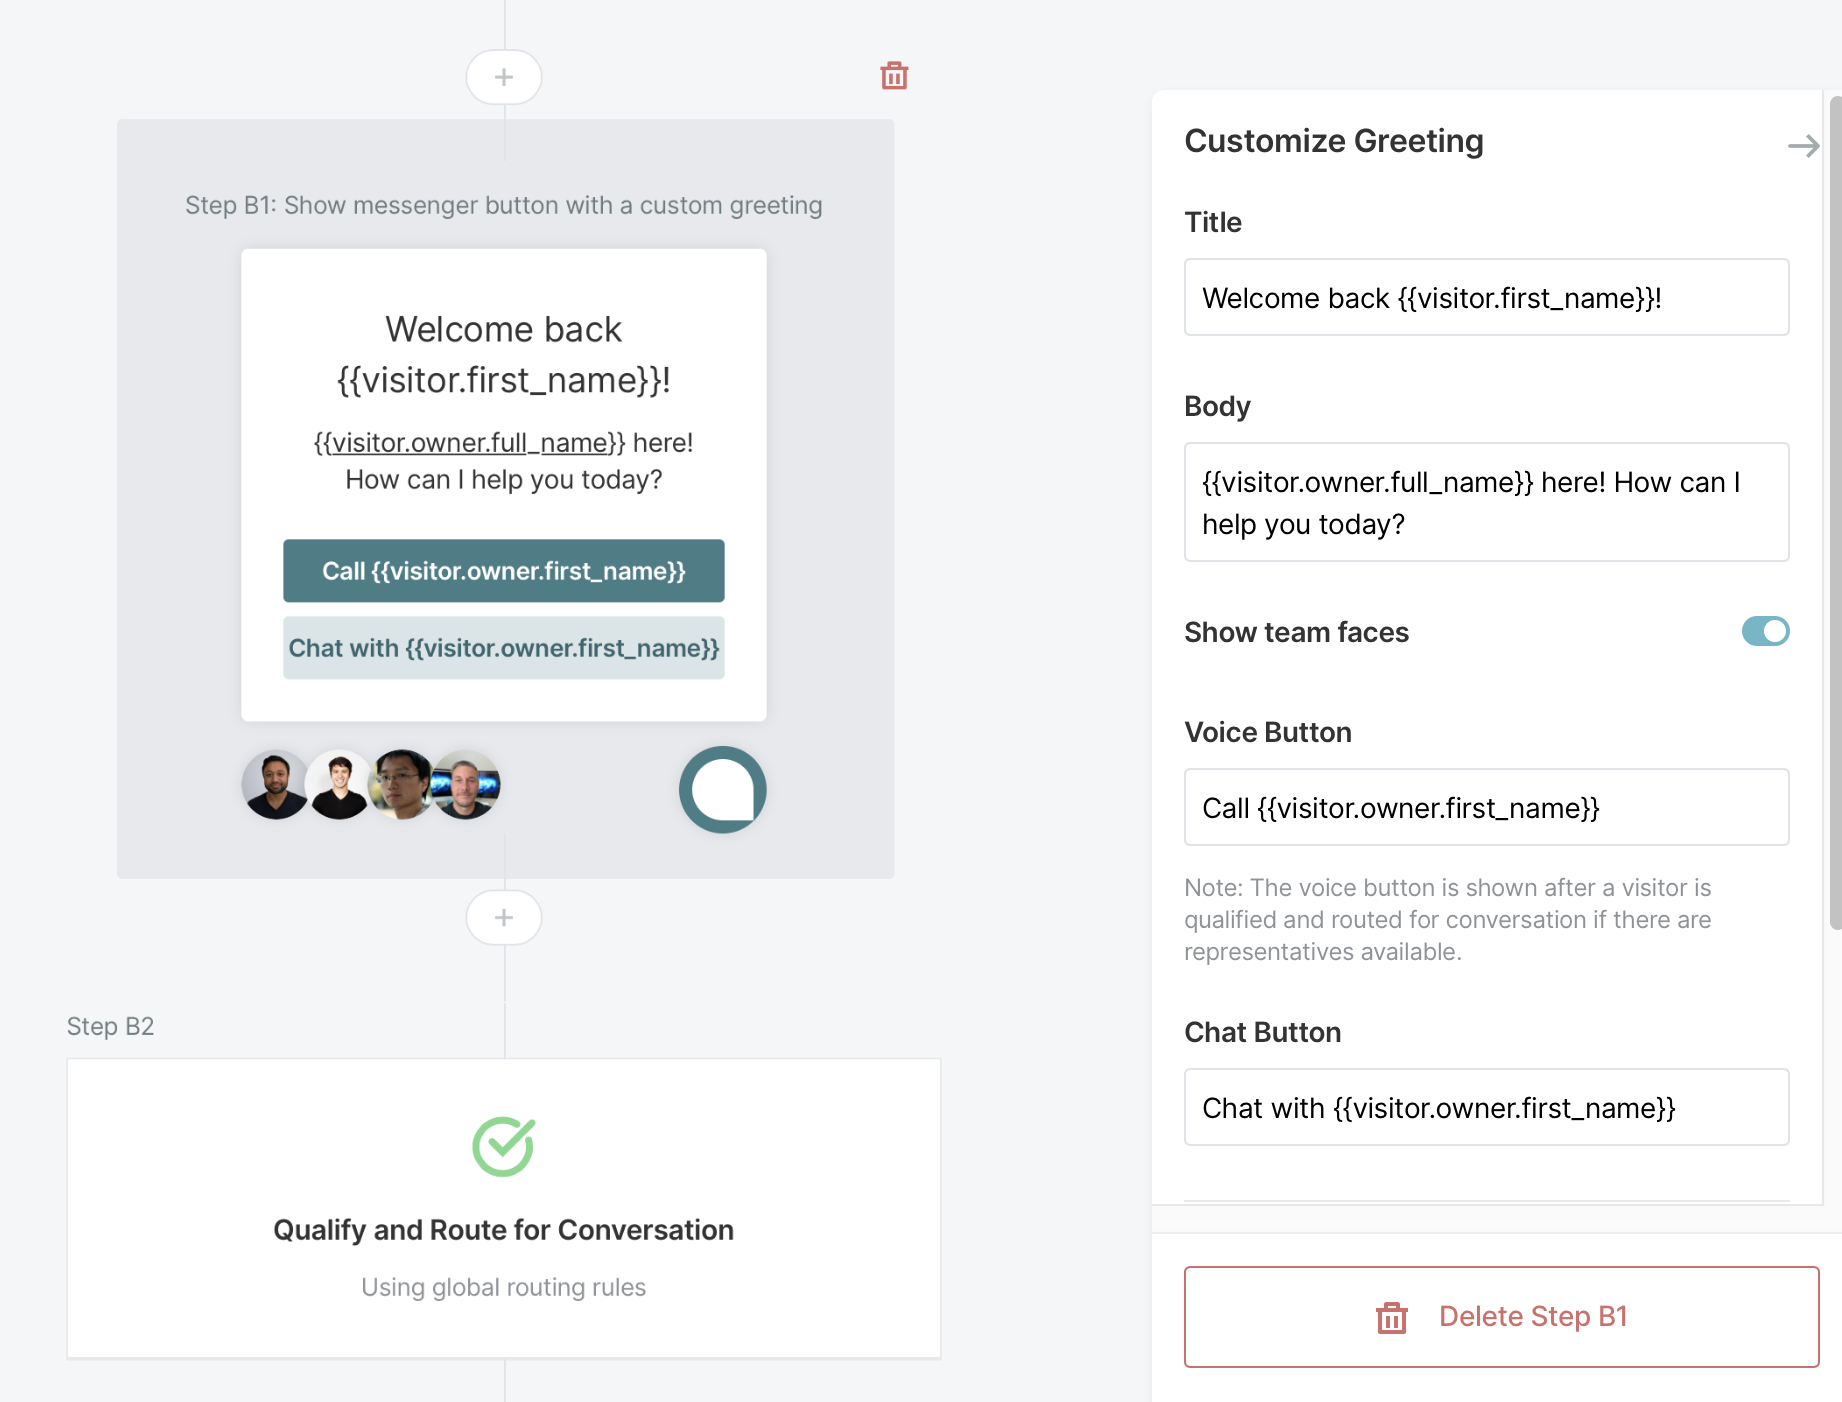
Once you’re in your return user experience, like the one shown below, edit the greeting. In this example, we want to greet the visitor with their name to add personalization and also call out the owner of their account as someone who is available for chatting now. Use our variable tag builder to find the right syntax for each of your personalized fields.
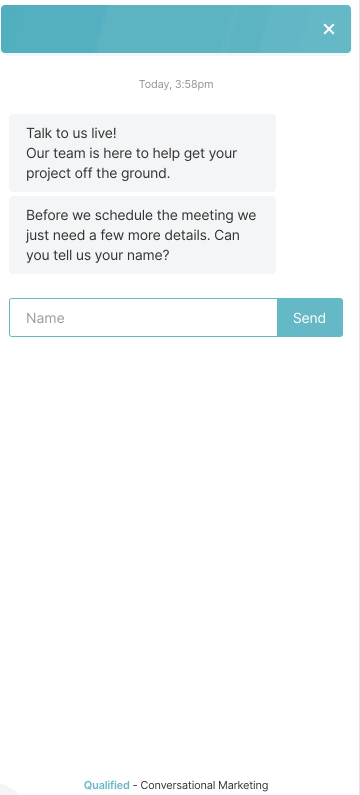
If you don’t already have information stored about your visitor, you can still personalize the experience after collecting this information. Just simply ask for their name and you can then address them as such for the rest of the experience. See the example below for more details.
Use Tags in the Messenger
Using the Qualified Syntax shown above, you can choose where to pull in the personalization for your visitor. You can add personalization tags in three places within your messenger: the titles, body, and buttons.
Check Your Syntax
The syntax for your variable fields will depend on what you are pulling in to your experience. If you're pulling in a visitor attribute that's based on IP address, such as state, country, or city, your syntax will look like the following:
{{visitor.first_name}}
{{visitor.last_name}}
{{visitor.city}}
{{visitor.state}}
{{visitor.country}}
{{visitor.region}}
If you're pulling in any other fields that you've specifically created in your visitor fields area, however, your syntax will be:
{{visitor.fields.<field_api_name>}}For example: {{visitor.fields.employee_size}}
As visitors come to your site, we'll mark them with a unique identifier. We’ll then use this unique identifier to store information about that person for their next visit. This is how we know to fill in the visitor field with their name, country, etc. when they return to the site and can use it to personalize their experience going forward.
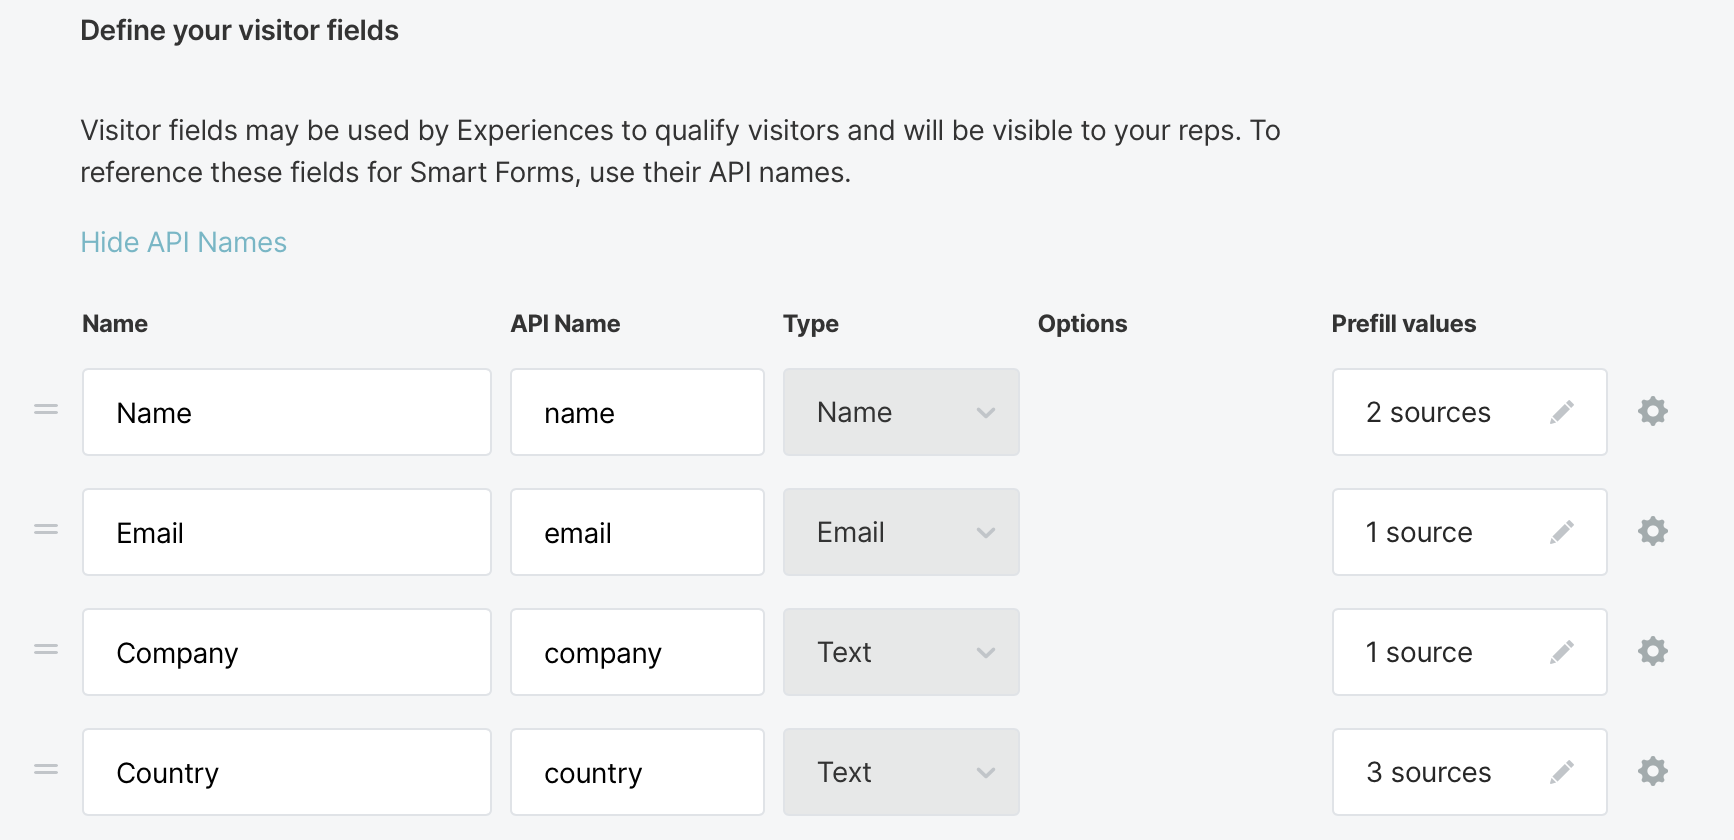
Click on the “API Name” option in your Visitor Fields to see the name that you’ll want to use in your syntax. For example: {{visitor.fields.company}} or {{visitor.first_name}}
Using Fallbacks
Fallbacks are available to be used in your experience and whenever using variable tags in Qualified. A fallback is a generic term or a generic version of the information you are trying to source that appears when you do not have specific information for your visitors.
You should use a fallback whenever possible by separating your variable tag with a pipe symbol and placing your fallback term in quotes as shown below.

Summary
There are multiple places you can use dynamic variable tags within Qualified to personalize your visitors experience. By using the Qualified syntax, you can pull in details about your visitor such as first name, or country from your visitor fields that store information about your returning visitors.


.svg)


