
In this article, you’ll learn how to build an experience to immediately display a meeting booker on specific landing pages or from custom URLs.

Getting Started
Before creating your experience, ensure your reps' calendar settings are updated and the desired meeting options are created.
There are many different options available for how to build a meeting booker experience. We recommend using a manually-triggered experience and will outline a common use-case below. We’ll then offer some alternatives to craft your meeting booker experience to best match your business needs.
Step 1: Structuring the Experience
Manually-triggered experiences are experiences that occur when a certain link is selected or a form is submitted. In this example, we’ll use a manually-triggered experience to build a unique URL that allows visitors to book a meeting with a specific member of your team.
To start:
- Navigate to the Experiences section.
- Select the + sign under Manually-Triggered Experiences to create a new experience.
- Name the Experience (Example: “Devin’s Meeting Booker”).
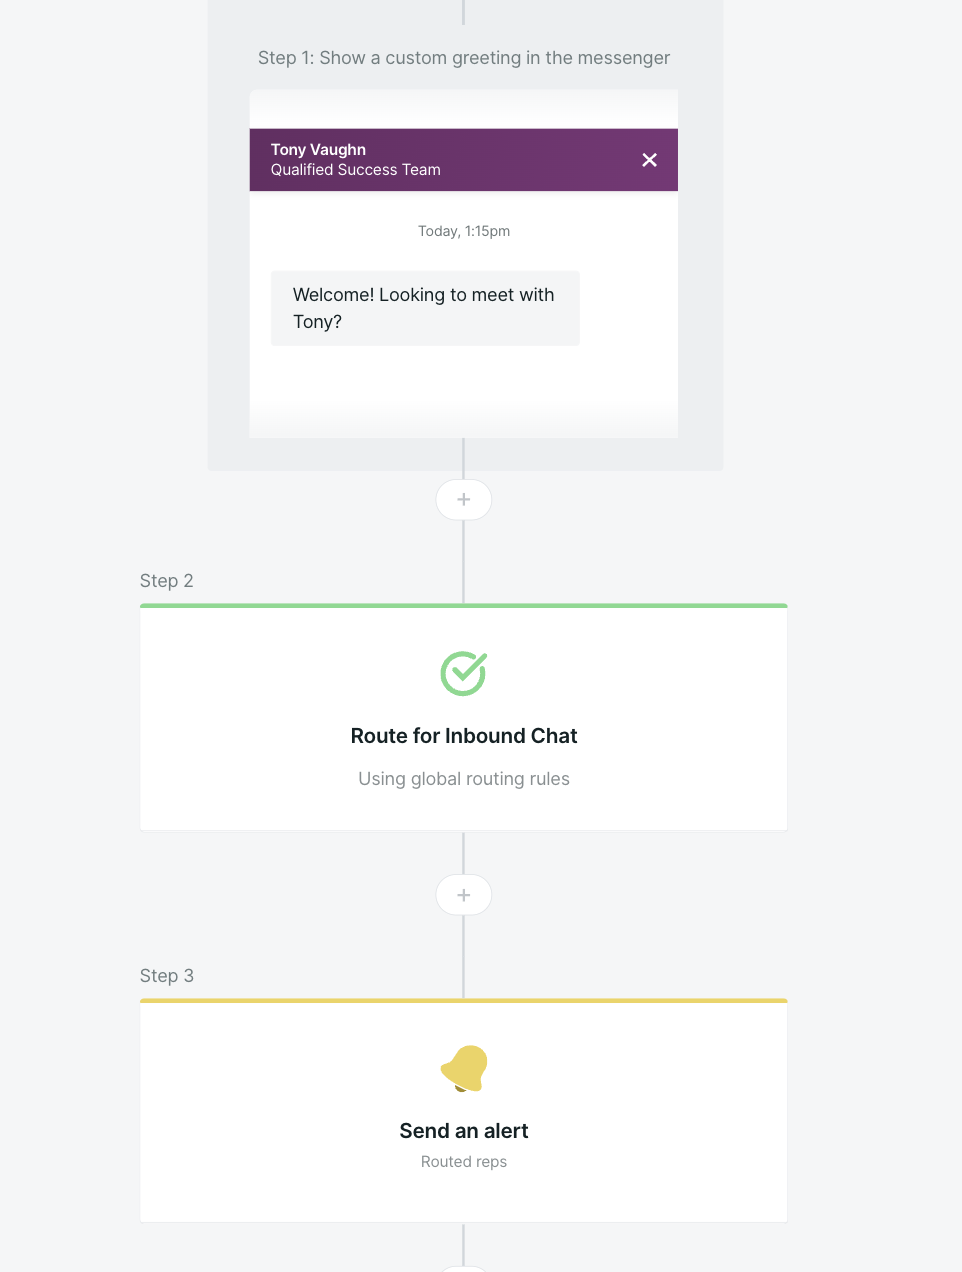
- Place a Custom Greeting step in the experience.
- Place a Route for Inbound Chat step in the experience.
- Place any additional alerts, such as a Slack or Microsoft Teams alert.
- Click into each of these steps and customize the Visitor and Alert texts.
Step 2: Routing the Meeting Booker
Once those actions are customized there’s a few settings we need to adjust:
- Select the Route for Inbound Chat step.
- Check “I know who I want to Route to.”
- Click “Edit” and uncheck “Route to Salesforce owner.” (and if applicable, Outreach or Salesloft).
- In the “Route to” section, select the User this meeting booker is for.
- Ensure the “Book meetings with these users” checkbox is checked.

Step 3: Customize Offering a Meeting
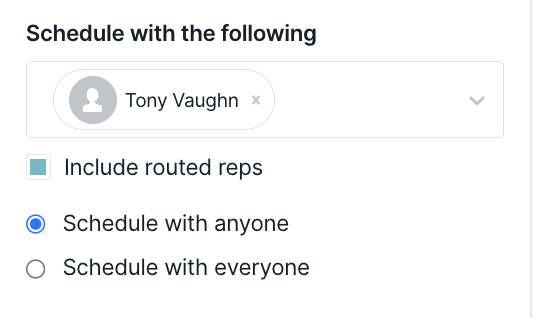
Click into the meeting booker and select the individual you would like the meeting booker to schedule with.
Step 4: Building Your Unique URL
Once the experience is built, we can trigger it on any page of your website by using a specific URL parameter. For this, you’ll need three pieces of information:
- The URL of the page this will be displayed on. We use our University page - but this can be any page you’d like: For example: www.acmeexplosives.com
- Our special parameter: ?q_showExperience=
- The Experience ID. In the example below, we will use experience-1616518569689
To locate the Experience ID and build the URL:
- Head to the experience builder.
- Select your manually-triggered meeting booker experience.
- Highlight the Experience ID for your experience, labeled API NAME in the upper right-hand corner. This will look similar to: experience-1616518569689
- Select the boxes on the right to copy that ID.
- Take the URL of the page you would like this meeting booker to display on: www.acmeexplosives.com
- Append the parameter above to the end of that URL: www.acmeexplosives.com?q_showExperience=
- Place the Experience ID at the end: www.acmeexplosives.com?q_showExperience=experience-1616518569689

Ta-da! When this URL you created is visited, we’ll automatically display the meeting booker experience. Use this to give prospects easy access to your team's calendar.
Providing Additional Meeting Options
You may want to offer multiple lengths of time for visitors to choose from or other options which will determine what type of meeting occurs. This can be done with a custom question and branching logic. Below we will show how to provide a selection of different meeting lengths. This same process can be applied to allow the selection of different reps, teams, and more.
To build a meeting booker that allows a visitor to select a specific time-slot length:
- Place an “Ask a Question” action at the top of the “No” branch in your experience.
- Select “Picklist.”
- Enter your message.
- Provide your options. We recommend listing a reason and time length, as shown below.

Next, we’ll build the branching logic continuing the example above:
- Place a “Branch” action above your “Offer a Meeting” action.
- Set the rules so that, if the visitor matches “Custom Question” “How long of a meeting” “is any of” “Quick Question (15 Minutes),” they will go to the right side of that branch.
- Select the “Offer a meeting” action below the Match side of that branch and ensure that Meeting Type matches the selection above. (see Calendar Meeting Types above to add more)
- Repeat these steps under the “No Match” branch, offering the corresponding meeting type based on the visitor's selection.

In these examples, our “Ask a Question” action can often be before or after your Route for Inbound chat step without making a difference to the experience and logic. In some cases, such as selecting a meeting time, it may make a simpler experience to place it on the “Rep available? No” branch. In other cases, such as selecting which person or team to meet with, it will need to be placed above the Route for Inbound Chat step so that each branch can utilize its own routing criteria.

.svg)


