
When a visitor is matched to a Salesforce account, we present Signals data in the Account 360 and on the visitor’s associated account object in Salesforce. Qualified pushes Signals data into Salesforce to update your mapped fields with the most recent information.
Map Signals Fields in Qualified
First, your Salesforce admin needs to create new fields in Salesforce for Qualified Signals data. This can be done manually or by downloading the Signals unmanaged package.
To map the new Salesforce fields, log in to your Qualified admin account and:
- Click the Settings icon on the left.
- Click Salesforce under Signals.
- Below Signals Fields, there are two columns. The type of Signals data is listed in the first column. Choose the new corresponding Salesforce field from the second column, Account field. Repeat this for every listed Signals field.
- Click Save.
When Signals Data is Updated in Salesforce
Qualified pushes an account's Signals data into Salesforce at 9:00 pm PT when there are no website visitors from that account in the last 24 hours. When someone from that account does visit your website, Qualified pushes any updated Signals fields into Salesforce within five minutes.
Add the Visualforce Component in Salesforce
We recommend adding the Signals Account 360 snapshot to your Salesforce account page layout. This aggregates information about your accounts in a single place—and right where your team already looks.
To locate the Qualified Signals Visualforce component:
- Click the Settings icon on the left.
- Click Salesforce under Signals.
- Below Embedded Visualforce Component, copy the code snippet:
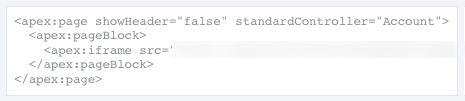
Your Salesforce admin can then update your account page layout. While your Salesforce instance may vary, this is typically done by:
- Navigating to the Visualforce Pages from the Quick Find search.
- Above the list of Visualforce Pages, click New.
- Enter a Label and Name, such as “Qualified Signals.”
- In the Visualforce Markup editor, delete the default text and paste the code snippet you copied earlier from Qualified.
- Click Save.
- Using the Quick Find search, navigate to Object Manager.
- Click Account.
- Click Page Layouts.
- Select the account page layout where you want to add the Signals snapshot.
- In the Account Layout header, click Visualforce Pages.
- Locate your newly saved Qualified Signals Visualforce Page. Drag and drop it into your account page layout.
- Click Save.
Recommended Dimensions
We recommend making the Qualified Signals Visualforce at least 735 pixels wide, which will display the Account 360's Engagement Score, Research Intent, and most recently viewed page. If you want to also include the activity panel, we recommend 1,250 pixels wide.

.svg)


